

Quick answer
Choose hotel bedside reading lights by mapping the bed, headboard, reading plane, and guest eye line. Compare recessed, surface-mounted, and flexible forms against one room brief. Test beam comfort, switch reach, installation clearance, and service access in a mock-up. Approve the exact product configuration and supporting drawings before ordering.
How to choose hotel bedside reading lights starts with the guest, the bed layout, and the reading position. A fitting must put useful light on a book without shining into another guest's eyes. It must also fit the headboard, work with the room controls, and remain serviceable after installation. This guide gives hotel designers, contractors, and sourcing teams a practical order for making those decisions. It includes real MYDE model examples, a mock-up test, and a brief you can send to suppliers.
The right choice depends on the whole bedside arrangement. A compact recessed head may suit one headboard. A surface-mounted reading light may suit another. A flexible arm may be easier to aim where guest posture varies. Start with the room drawings, then compare fittings against the same requirements.
Start with the guest task and bed layout
Define what the guest should be able to do before selecting a fixture. Reading a paper book, using a tablet, and moving around at night are different tasks. One small reading head should not be expected to replace the room's ambient lighting.
Mark both sleeping positions, the likely reading plane, and the sitting eye line on an elevation. Check the mattress height, pillows, headboard thickness, bedside table, and adjacent wall. Those details determine where the light can be mounted and aimed.
For a twin room, confirm whether both guests need independent control. For a double room, check whether one person can read without lighting the other side. These are mock-up questions. A product photo cannot answer them.
The hotel bedside reading lights category shows one family of wall-mounted options. Use the category to shortlist forms, then review the mounting and control details of each model.
Put the reading plane on the drawing
Draw the expected book or tablet position instead of specifying light only at the mattress. A guest may read upright, reclined, or lying down. The fitting should remain usable across the positions your room design supports.
Record the distance from the proposed fitting to the reading plane. Note any tall pillow, deep headboard, or side table that may block the beam. Then test the actual product at those dimensions. Avoid copying a mounting height from a different room.
Check the viewing angle for both guests
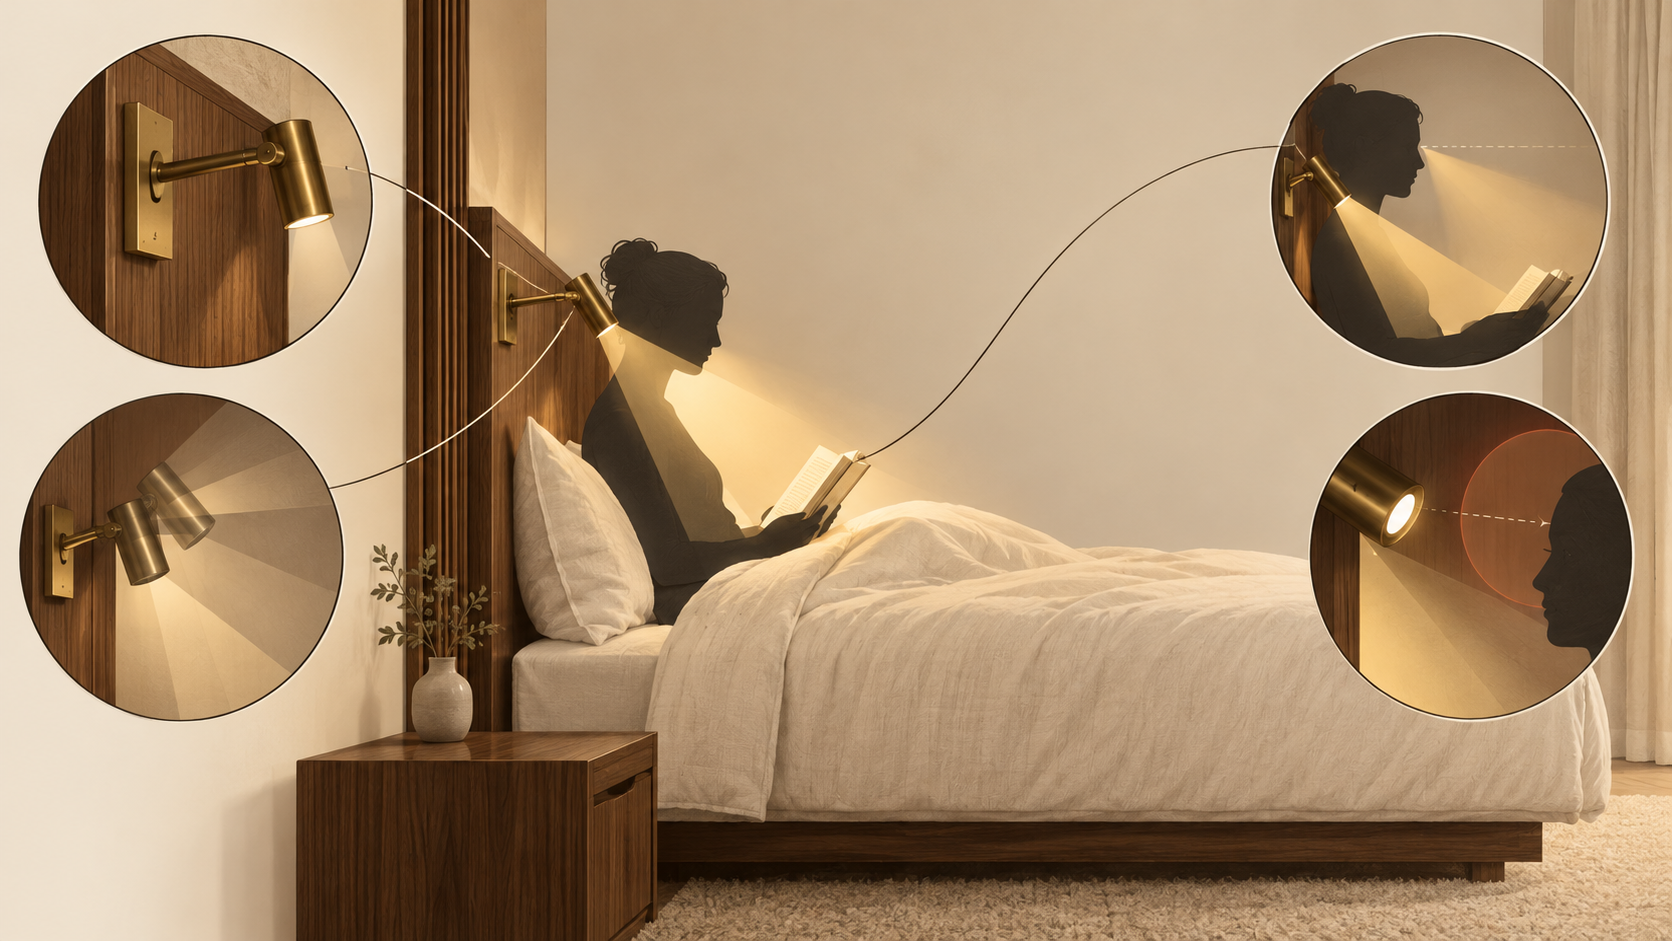
Sit in the mock-up bed at both positions. Look toward the lamp when it is aimed at the book. If the light source is conspicuous or uncomfortable, change the position or shielding before approving the fixture.
Check the neighboring pillow as well. A bright patch on the other guest's face can be a problem even when the page looks well lit. Aimability and shielding both matter.

Choose a mounting format that fits the project
The mounting format affects joinery, wiring, appearance, and maintenance access. Compare it early, while the headboard and electrical drawings can still change.
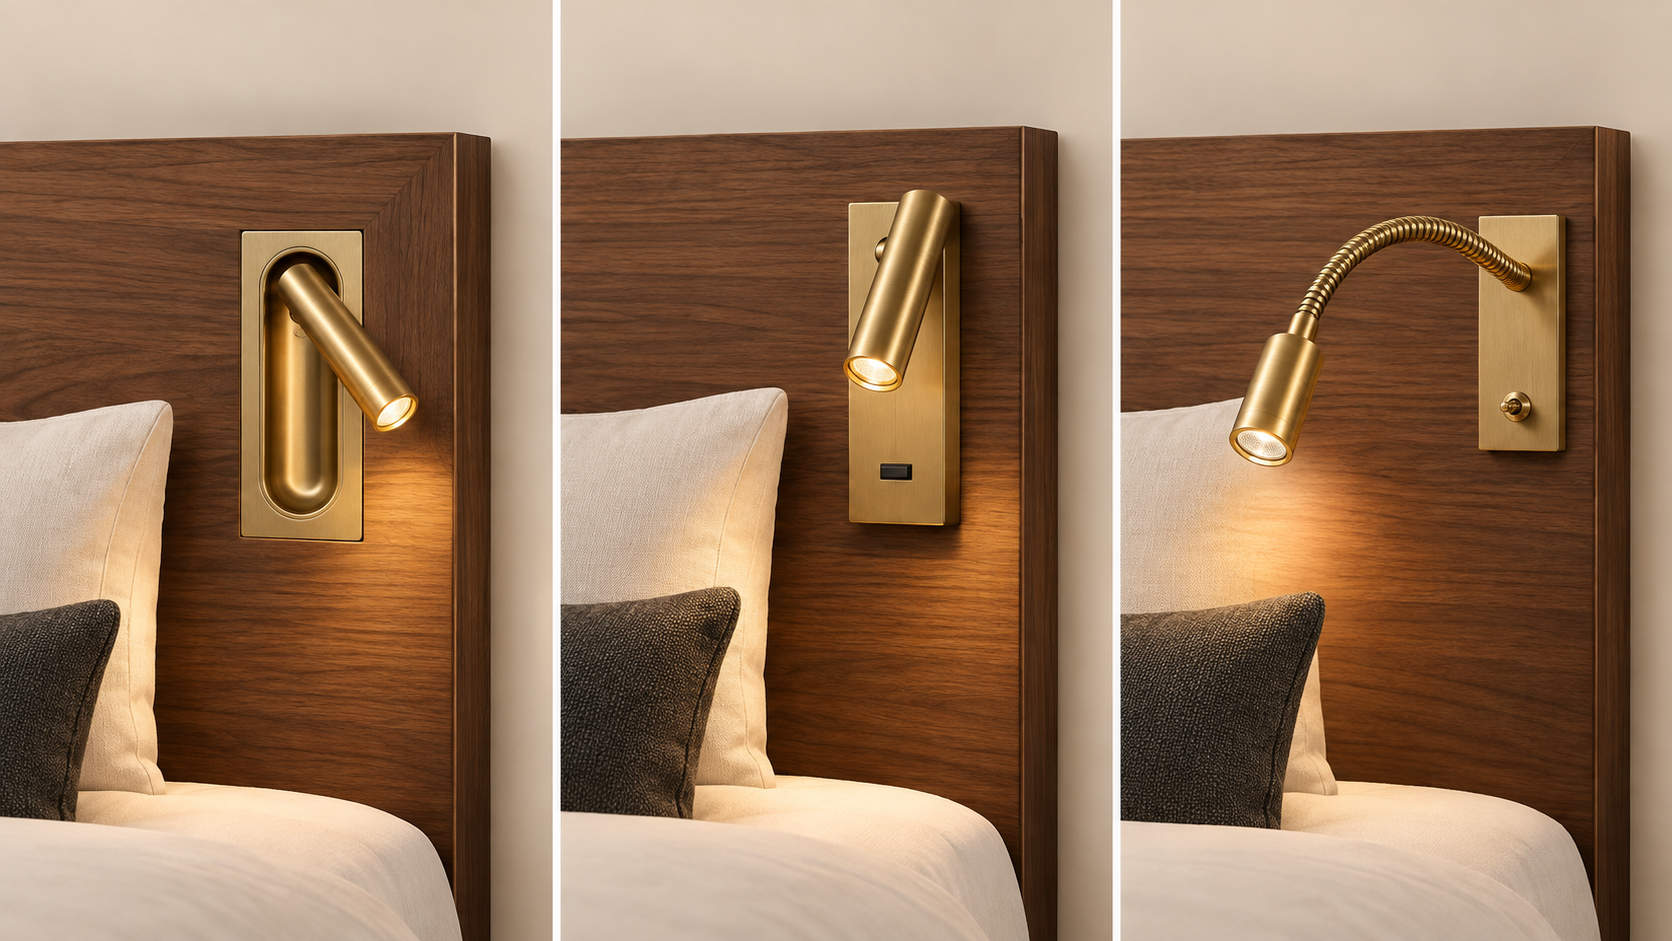
Recessed reading lights
A recessed fitting can give the headboard a tidy appearance. It needs enough space behind the faceplate for its body, wiring, and fixings. A visible front dimension is not the same as a cut-out dimension.
For example, MD-WL-Y135 recessed bedside reading light has a stated overall size of 168 × 68 × 52 mm. Its exact cut-out and dimension axes still need confirmation. Do not use those three figures as an installation drawing.
Ask for a verified cut-out, installation depth, fixing method, and cable route before joinery production. Check whether the fitting remains accessible once upholstery and wall finishes are complete.
Surface-mounted reading lights
A surface-mounted fitting can work when the room cannot accept a recessed body. It still needs a secure backplate, a compatible wiring position, and enough clearance around the head. Confirm whether the cable entry and mounting bracket suit the actual wall construction.
MD-WL-Y003 surface-mounted reading light combines a 3 W adjustable head with a physical toggle switch and one USB-A port. Its launch pack states that the reading light is not dimmable. Treat charging and light control as separate requirements, even when they share a faceplate.
Flexible or extended heads
A flexible arm gives guests more freedom to move the head toward a book. It also changes the visual footprint beside the pillow. Check how far the arm extends into the guest's space, and whether it can be parked neatly when unused.
MD-WL-Y092 flexible gooseneck reading light has a confirmed 3 W reading light, flexible metal arm, touch dimming, and toggle switch. Its precise touch-control sequence remains to be documented. Test that sequence with a sample before specifying it for guestrooms.
No format is automatically best for every project. Choose the one that fits the room geometry, guest use, installation method, and service plan.
Evaluate light at the page, not from watts alone
Wattage describes electrical input, not the useful light falling on a book. A beam angle describes distribution, not the final result in a specific room. Compare fittings at the intended mounting distance and aiming position.
Ask for a photometric file or measured performance data for the exact product configuration. Then review the reading plane in a room mock-up. The page should be comfortably visible without strong spill across the bed or bright light in the reader's eyes.
If a supplier quotes lumens, ask whether the figure is for the LED source or the complete fitting. If it quotes a beam angle, ask which configuration was measured. A different optic, lens, or mounting distance can change the result.
Colour temperature is another project decision. Review a physical sample beside the room's ambient light, fabric, timber, and wall finish. The selected option should belong to the signed product schedule. Do not assume a product with several factory options can change colour temperature in the guestroom.
The Y135 launch pack lists 2700 K, 3000 K, and 4000 K as selectable configurations. Those are order options, not a claim of guest-controlled colour changing. Its 30° beam and CRI above 90 are model-specific facts. Do not apply them to other MYDE lights.
For a deeper explanation of distribution, read the hotel reading light beam-angle guide. Use it alongside the actual room geometry and measured product data.
Check aiming, glare, and the parked position
A head should reach the reading plane without requiring an awkward guest posture. Test it while sitting upright and while reclining. Check whether the guest can move it without touching a hot surface or disturbing nearby trim. Temperature must be verified on the actual sample.
Do not treat a wide adjustment claim as proof of comfort. A movable head can still expose the source to the reader's eye. Conversely, a well-positioned fixed head may work in a tightly controlled room layout. The mock-up decides.
The parked position also matters. A projecting arm can conflict with pillows, cleaning routines, or bed-making. A recessed head may look discreet when stowed but still require a clear hand position to extend it.
Make a short video or photo record of the approved aiming and parked positions. The record helps procurement and installation teams compare the final sample with the mock-up. It is project documentation, not a performance certification.
Separate switching, dimming, and charging decisions
Write down how the guest should turn the reading light on and off. Check whether the switch is visible and reachable from the pillow. In a shared room, verify independent left and right control.
If dimming is required, identify the exact product and control method. Confirm the low-end behavior, the off state, and any interaction with the room's master switch. A dimming requirement in the room brief does not make every shortlisted fitting dimmable.
Y003 has a physical toggle switch and is specified as non-dimmable. Y092 has confirmed touch dimming and a toggle switch, while their operating relationship needs a sample check. Y135 has a concealed switch for its reading light; its trigger mechanism and dimming capability are not established in the source pack.
Treat USB ports and power outlets as separate electrical items. Check the approved output, connector type, wiring, and applicable market requirements. A visible cable in a lifestyle image is not evidence that a product includes charging.
If bedside charging is in the brief, review the USB and charging options for hotel wall lights. Specify the port only when the product record and technical documentation confirm it.
Coordinate the wall, headboard, and electrical package
The fixture choice is incomplete until the installation team can place it accurately. Compare the architect's elevation, joinery section, electrical drawing, and product drawing. Look for mismatches before approving a sample.
Confirm the cut-out or backplate dimensions. Check the available depth, fixing substrate, cable entry, driver location, and access for replacement. Record who supplies each part. If a lamp, socket, or driver is separate, the purchase schedule must say so.
Ask the electrical designer to confirm voltage, controls, local code, and protection requirements for the destination market. Do not copy a compliance mark from a concept image. Request the actual document for the ordered configuration and region.
For a renovation, measure a representative existing room. Hidden conditions can vary between rooms. A proposed replacement should be checked against the real opening, wall build-up, and wiring before a project-wide order.
Installation drawings should use verified dimensions. The Y135 overall size does not establish its cut-out. Y092 has documented component dimensions, but its backbox and cable-entry details still need confirmation. Those gaps belong on the project question list, not in public claims.
Compare three real MYDE product directions
The following examples show how one room brief can lead to different product checks. They are not a ranking, and they do not claim that the models are interchangeable.
- **MD-WL-Y135 — compact recessed appearance.** Confirmed facts include a 3 W reading head, recessed mounting, concealed switch, and adjustable head. Its launch pack lists 350° horizontal and 90° vertical adjustment. Ask for the cut-out, wiring method, and final finish sample before approval.
- **MD-WL-Y003 — surface-mounted light with USB-A.** Confirmed facts include a 3 W head, one BJB toggle switch, one USB-A port rated 5 V/2 A, and no dimming. Its surface mount and charging feature may suit a different headboard and electrical brief. Verify the installation hardware and destination-market documentation.
- **MD-WL-Y092 — flexible gooseneck.** Confirmed facts include a 3 W light, flexible metal arm, touch dimming, and a toggle switch. Use a sample to check reach, parked position, and control sequence. Do not infer charging from a lifestyle image.
These comparisons make the trade-offs visible. The product pages hold the model-specific facts and galleries. The design team still needs room drawings and an approved sample to decide which fitting suits its project.
Test one mock-up before approving the schedule
Build the mock-up at the actual bed and headboard dimensions. Install the candidate fitting at the proposed position. Use the intended room finishes and the intended control arrangement where possible.
Have someone read at both sides of the bed. Test upright and reclined positions. Check the page, the reader's eye line, the neighboring pillow, and the reach to the switch. Repeat the test with the ambient room lighting on and off.
Next, ask housekeeping or maintenance staff to assess access. Can the surface be cleaned without awkward handling? Can the light source or assembly be serviced under the proposed installation? Record any part that needs a drawing or replacement instruction.
Take photographs of the accepted position and note the exact product configuration. Include finish, colour temperature, control method, and any separately supplied component. If a specification changes after the mock-up, repeat the relevant checks.
This is a practical approval process, not a claim that a given fixture meets an illuminance or glare threshold. Set any numerical target in the project brief and verify it with appropriate measurements.
Send a clear brief to every shortlisted supplier
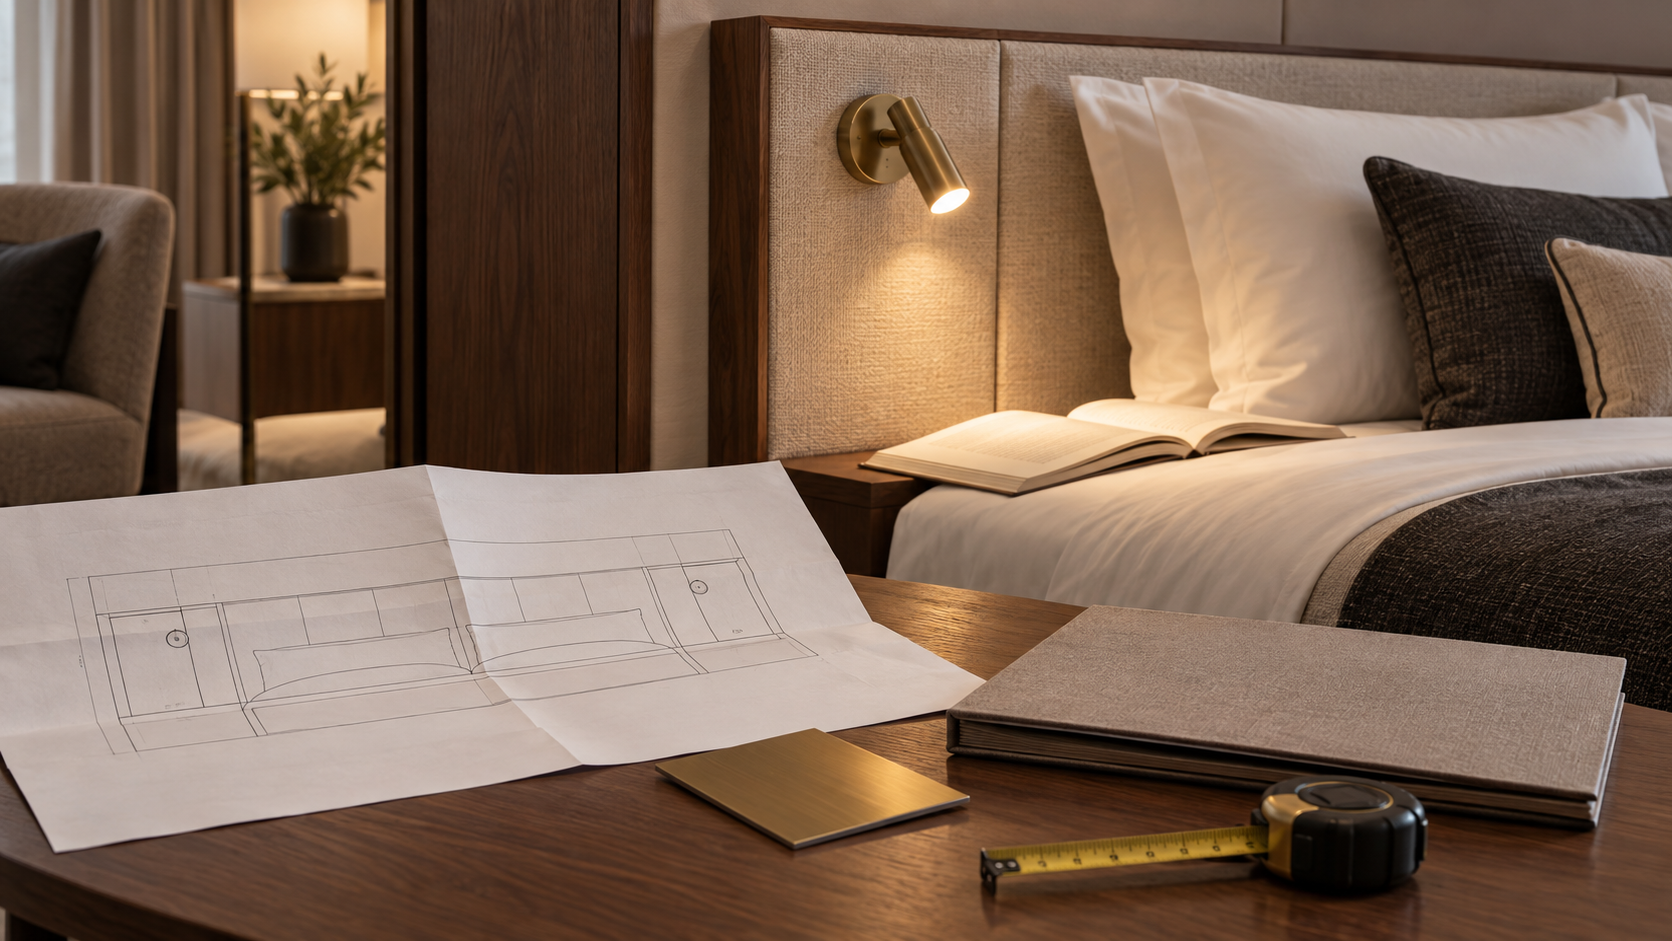
A comparable response begins with a comparable request. Send the same room information and product questions to each supplier. Ask them to identify confirmed facts and unresolved items separately.
- Room type, bed size, headboard elevation, and wall or joinery section.
- Desired mounting format and proposed position on each side of the bed.
- Reading-plane location, guest posture, and any project light-level target.
- Required aiming range, shielding, and parked position.
- Left and right switching behavior, dimming method, and master-switch interaction.
- Charging or outlet requirement, if any, as a separate line item.
- Destination market, electrical supply, and documentation required by the project team.
- Desired finish, colour temperature, and approved sample process.
- Required installation drawing, photometric data, replacement instructions, and spare-part information.
- Product model, exact configuration, sample quantity, and the questions still open.
Do not assume a supplier can provide every document immediately. Mark missing evidence and decide whether it blocks shortlisting, sample approval, or final ordering. This keeps unsupported claims out of the purchase schedule.
For a broader procurement framework, use the hotel lighting procurement checklist. Keep the reading-light decisions in this guide tied to the actual bedside layout.
Avoid three common selection mistakes
The first mistake is choosing by appearance alone. A clean product image cannot show eye-line glare, switch reach, or the space behind a headboard. Use a sample at the proposed position.
The second is copying a specification value across models. A 3 W rating, beam angle, or charging port belongs to a particular configuration. Read the exact product record and supporting document before using it in a tender.
The third is approving a fitting before installation details are settled. A faceplate size does not prove cut-out size or cable clearance. Ask for the drawing and check the real wall section.
The best bedside reading light is the one the project team can specify, install, test, and maintain with confidence. Start with the room, compare verified options, and approve the chosen configuration in a mock-up.
Questions to resolve
01How high should a hotel bedside reading light be mounted?+
There is no mounting height that fits every room. Mark the reading plane and sitting eye line on the headboard elevation. Test the proposed position with the real mattress, pillows, and product sample. Check switch reach and the neighboring guest’s view before approving it.
02How many lumens does a hotel bedside reading light need?+
A source-lumen figure alone cannot describe the light on a book. The optic, mounting distance, and aiming position affect the result. Set any project illuminance target with the lighting designer, then verify the exact fitting with measured data and a room mock-up.
03Should hotel bedside reading lights be dimmable?+
Dimming is a project requirement to decide, not a feature to assume. MYDE MD-WL-Y003 is specified as non-dimmable. MD-WL-Y092 has confirmed touch dimming, but its precise control sequence needs sample review. Check the selected product and room controls together.
04Can a bedside reading light include USB charging?+
Some models include charging. MYDE MD-WL-Y003 has one confirmed USB-A port rated at 5 V/2 A. Charging should be a separate line in the electrical brief. Confirm the port, output, wiring, and destination-market documentation for the exact ordered configuration.
05What should be approved before a hotel-wide order?+
Approve the room mock-up, exact model and finish, control sequence, mounting drawing, wiring plan, and any separately supplied components. Request product-specific photometric and compliance documents when the project requires them. Record unresolved items before the bulk schedule is signed.
